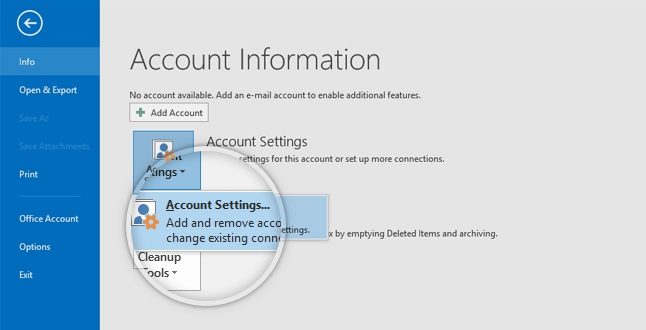
To add an email account in Microsoft Outlook, please open the application and proceed to File > Account Settings > Account Settings. For users of the Mac version, locate the menu under Outlook > Preferences > Accounts.
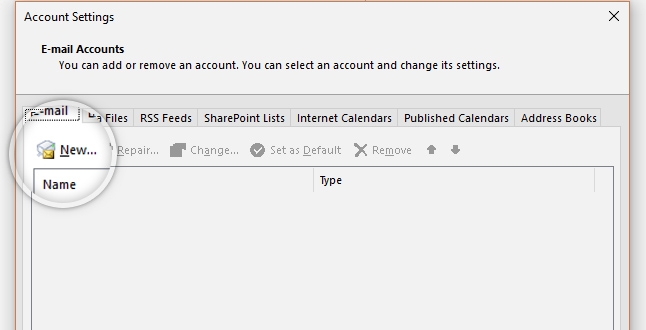
From the new window click New.
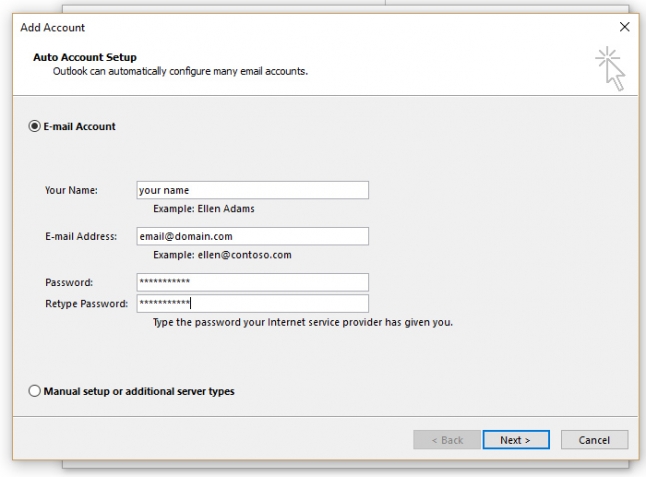
Next, enter your name, email address, and password into the designated fields, then click “Next.”
Outlook will automatically establish a connection with the hosting server, identify the preconfigured settings, and apply them on your behalf. Simply click “Next” to proceed with adding the account.
Manually configure Outlook
To integrate your email account into the most recent iteration of Microsoft Outlook, kindly follow these steps:
Navigate to the “File” menu. Select “Account Settings,” followed by “Account Settings” again. If you’re utilising the Mac version, locate the corresponding options under “Outlook” > “Preferences” > “Accounts.”
To begin, click on the button New on the new window that opens.
In the new window, enter your full email address. Then, select “Advanced options” and check “Let me set up my account manually” before clicking “Connect.” Next, choose either POP or IMAP for the connection protocol. If you’re unsure about the difference, refer to the tutorial provided.
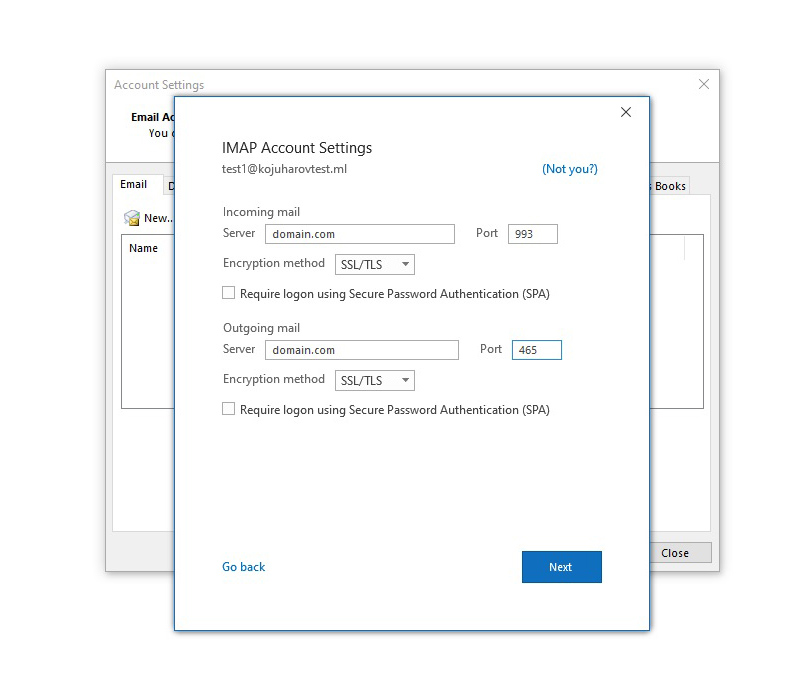
You must provide the correct details for your email account. Here’s a quick breakdown:
Incoming mail:
- Server: Find the exact hostname in Site Tools > Email > Accounts, select your email account, and go to Menu > Mail Configuration > Manual Settings.
- Port: Use 993 for IMAP or 995 for POP3.
- Encryption: SSL/TLS.
- Secure Password Authentication (SPA): Leave unchecked.
Outgoing mail:
- Server: Same process as incoming mail.
- Port: Use 465.
- Encryption: SSL/TLS.
- Secure Password Authentication (SPA): Leave unchecked.
For precise settings, locate them in Site Tools > Email > Accounts, select your email account, and go to Menu > Mail Configuration > Manual Settings.
Click “Next” and enter your email address password. Then, click “Connect.” If the details are accurate, your email account will be successfully added to Outlook.
