At Sky Blue Ocean Media, we’ve been using Elementor since day one, and it’s been a game-changer for us. This powerful page builder has been our go-to tool since its launch, consistently impressing us with its versatility and ease of use.
Over the years, we’ve built countless websites using Elementor, allowing us to fully explore its features and create unique, engaging pages that stand out.
Whether you’re just getting started with Elementor or you’ve been using it for some time, we know you’re probably looking for tips and tricks to elevate your designs.
Elementor offers a variety of ways to streamline your workflow and craft stunning pages with minimal effort.
In this article, we’ll share some of the best Elementor tips and tricks that you can start using right away.
Here’s how these tips will benefit you:
- Speed up your workflow and simplify the page-building process
- Leverage advanced features to add exciting visual elements
- Design sleek, professional pages with ease using Elementor
Top 5 WordPress Elementor Tips & Tricks
I’ve compiled the top Elementor tips and tricks in this article to help you boost your skills.
Let’s kick things off with the most essential and simplest tip — one that will save you time and streamline your workflow.
Copy/Paste Widgets & Sections
Have you ever needed to reuse sections or widgets on the same page or across different pages?
Many Elementor users simply duplicate a widget and then drag it to the desired spot — something I used to do when I first started.
But that method is inefficient and time-consuming, especially on lengthy pages.
A faster solution? Just copy and paste your widgets and sections in Elementor. Here’s how:
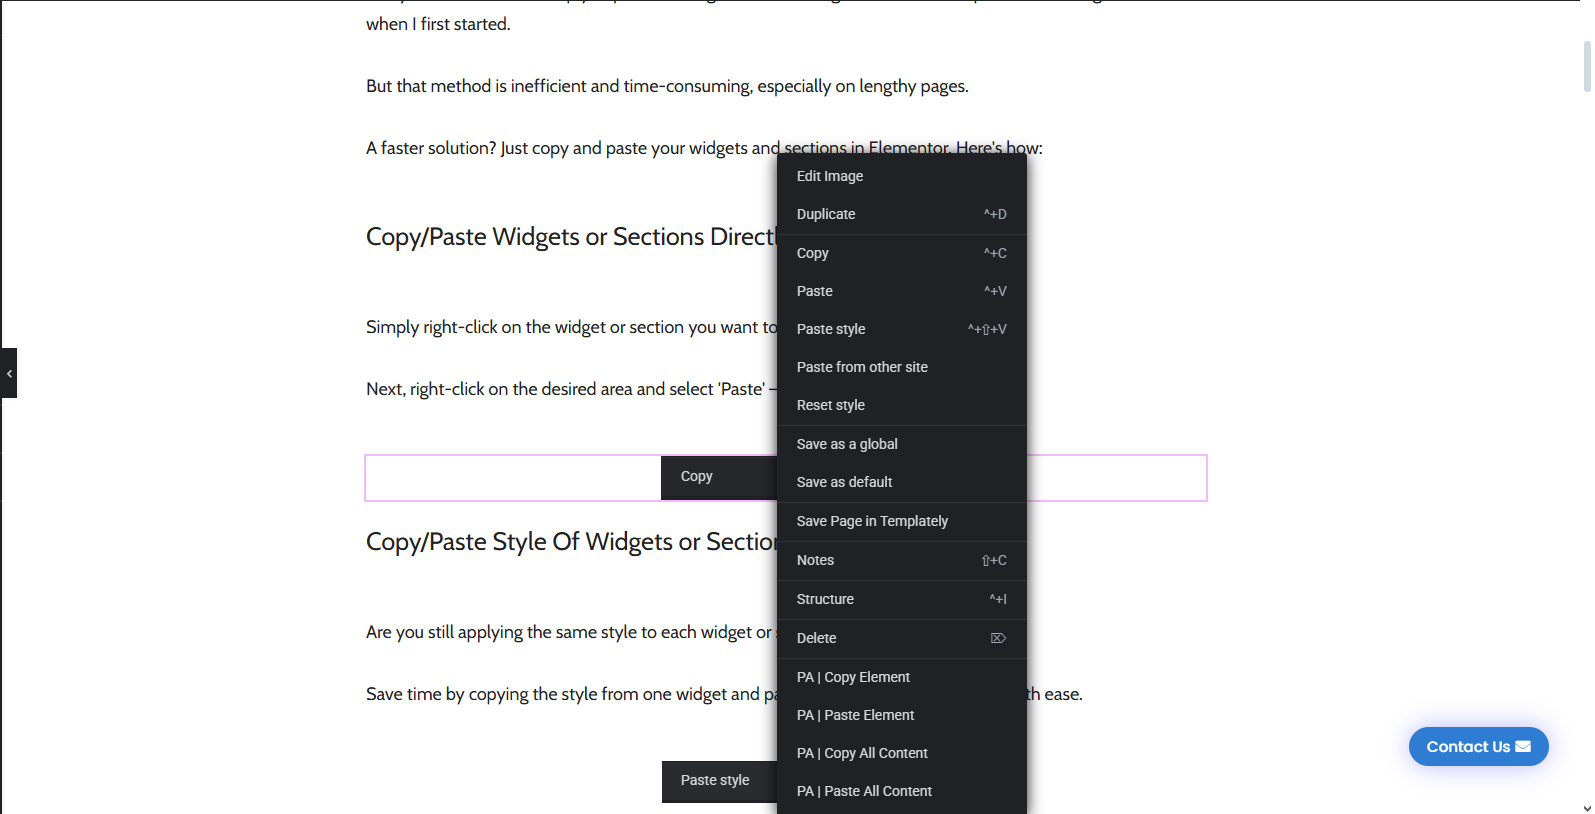
Copy/Paste Widgets or Sections Directly
Simply right-click on the widget or section you want to copy and select Copy.
Next, right-click on the desired area and select Paste — it’s that easy!
Copy/Paste Style Of Widgets or Sections
Are you still applying the same style to each widget or section manually?
Save time by copying the style from one widget and pasting it onto any other widget with ease.
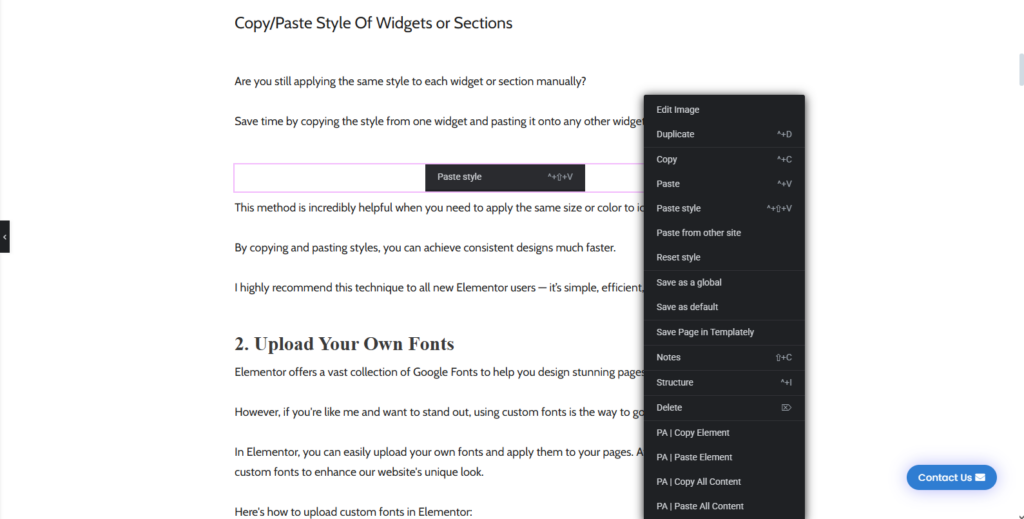
This method is incredibly helpful when you need to apply the same size or color to icons or images.
By copying and pasting styles, you can achieve consistent designs much faster.
I highly recommend this technique to all new Elementor users — it’s simple, efficient, and a real time-saver.
2. Upload Your Own Fonts
Elementor offers a vast collection of Google Fonts to help you design stunning pages.
However, if you’re like me and want to stand out, using custom fonts is the way to go.
In Elementor, you can easily upload your own fonts and apply them to your pages. At Pixify, we also use custom fonts to enhance our website’s unique look.
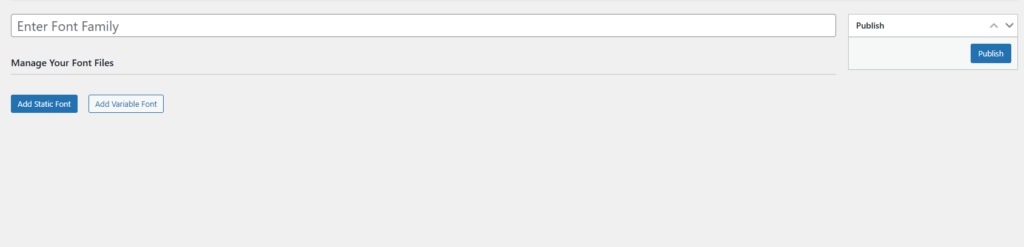
Here’s how to upload custom fonts in Elementor:
- In your WordPress dashboard, go to Elementor > Custom Fonts.
- On the Custom Fonts page, click Add New to upload your custom font.
You’ll need to upload your font in the following formats:
- woff
- woff2
- ttf
- svg
- eot
While uploading every format isn’t mandatory, it’s a good practice to ensure your fonts display correctly across different browsers.
If your font isn’t available in all these formats, you can use a font converter to generate the missing ones.
Also, remember to upload all variations of your font. Elementor allows you to specify the font weight and style during the upload process for better control over your typography.
3. Add Entrance Animation To Your Widgets/Sections
Even subtle visual elements can significantly enhance your website’s user experience. One simple way to achieve this is by adding entrance animation effects to your widgets and sections.
Elementor makes it easy to add these animations with its built-in features.
Here’s how you can add an entrance animation effect in Elementor:
- Select the widget you want to animate.
- Go to Advanced > Motion Effects.
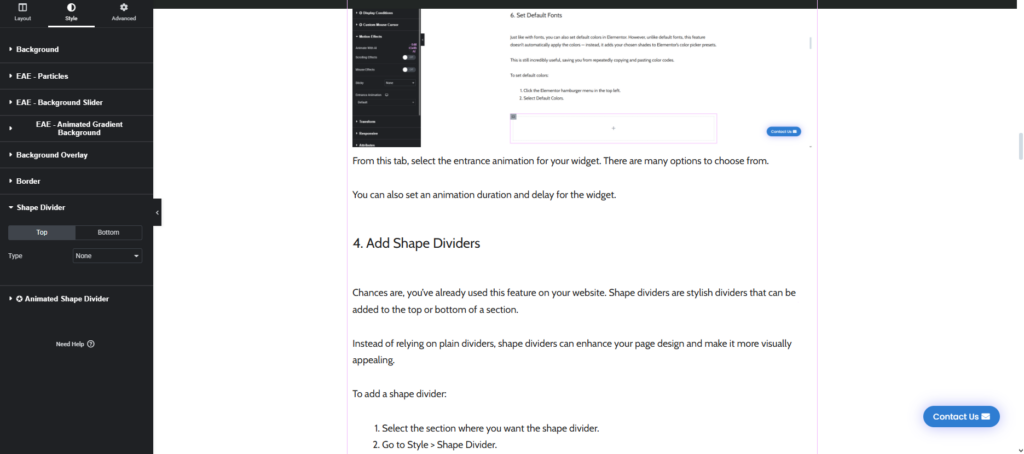
From this tab, select the entrance animation for your widget. There are many options to choose from.
You can also set an animation duration and delay for the widget.
4. Add Shape Dividers
Chances are, you’ve already used this feature on your website. Shape dividers are stylish dividers that can be added to the top or bottom of a section.
Instead of relying on plain dividers, shape dividers can enhance your page design and make it more visually appealing.
To add a shape divider:
- Select the section where you want the shape divider.
- Go to Style > Shape Divider.
You can place the shape divider at either the top or bottom of the section. With over 15 shape divider styles available, you have plenty of options to enhance your design.
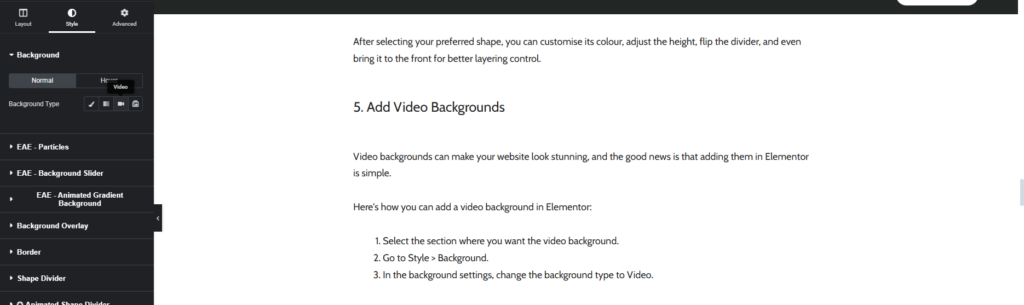
After selecting your preferred shape, you can customise its colour, adjust the height, flip the divider, and even bring it to the front for better layering control.
5. Add Video Backgrounds
Video backgrounds can make your website look stunning, and the good news is that adding them in Elementor is simple.
Here’s how you can add a video background in Elementor:
- Select the section where you want the video background.
- Go to Style > Background.
- In the background settings, change the background type to Video.
After selecting Video as the background type, you’ll need to add the video link.
You can also set a start time and end time for the video to control which part plays.
Additionally, there’s an option to upload a fallback image — this image will replace the video background on tablets and mobile devices for improved performance and compatibility.
6. Set Default Fonts
Just like with fonts, you can also set default colors in Elementor. However, unlike default fonts, this feature doesn’t automatically apply the colors — instead, it adds your chosen shades to Elementor’s color picker presets.
This is still incredibly useful, saving you from repeatedly copying and pasting color codes.
To set default colors:
- Click the Elementor hamburger menu in the top left.
- Select Default Colors.
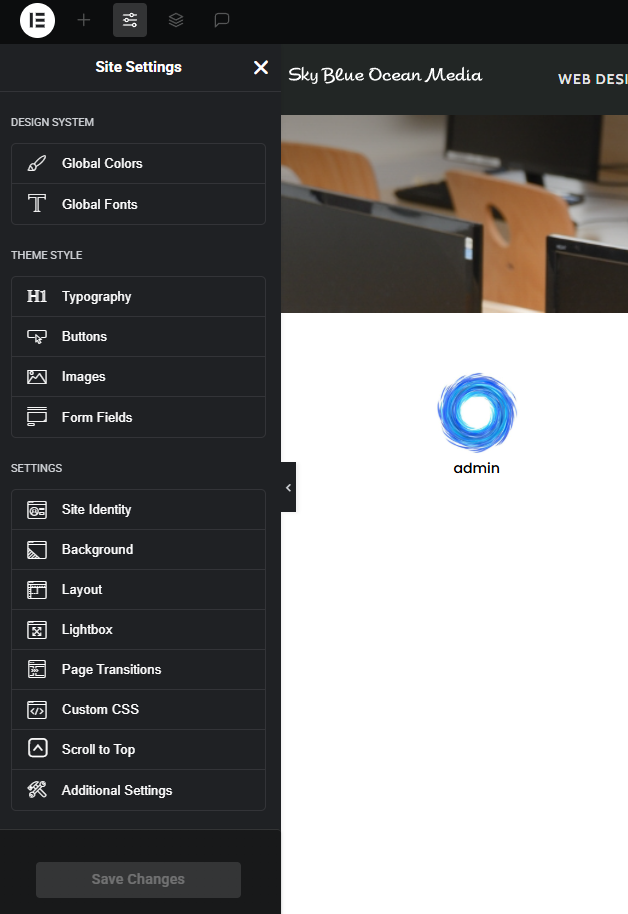
You can set default colors for Primary, Secondary, Body, and Accent elements.
If you prefer, Elementor also offers pre-made color palettes that you can choose as your default colors for a quick and cohesive design.
7. Add Parallax Effects
Parallax effects enhance your page by making it more engaging and immersive. Beyond aesthetics, they also improve the user experience by adding depth and interactivity.
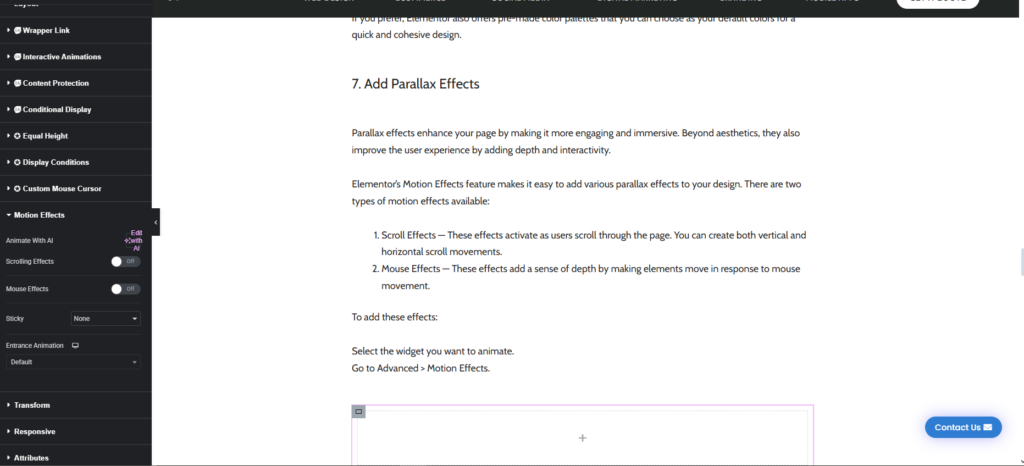
Elementor’s Motion Effects feature makes it easy to add various parallax effects to your design. There are two types of motion effects available:
- Scroll Effects — These effects activate as users scroll through the page. You can create both vertical and horizontal scroll movements.
- Mouse Effects — These effects add a sense of depth by making elements move in response to mouse movement.
To add these effects:
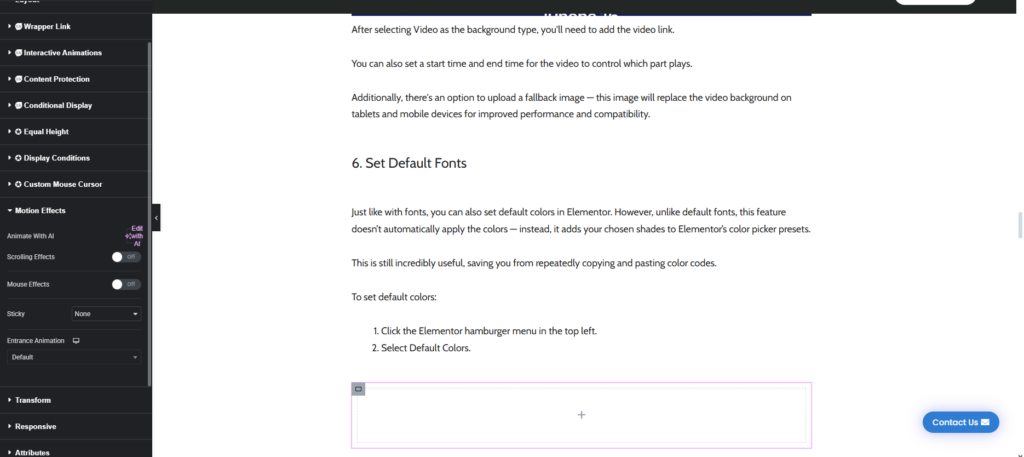
Select the widget you want to animate.
Go to Advanced > Motion Effects.
In the Motion Effects tab, you’ll find both Scroll Effects and Mouse Effects options.
Simply enable the effect you want and customise it to suit your design.
You can adjust various properties such as transparency, blur, scale, rotation, and more to achieve the perfect look for your widget.
8. Saving A Section As Template In Elementor
We’ve already covered how to create global widgets for reuse across your website. But what if you want to reuse a section with different content?
In that case, you can save sections or widgets as templates in Elementor. This allows you to reuse the design while customising the content as needed.

Give your template a name, and you’re all set! Your template will be saved in the Elementor templates library for easy access.
If you’d like to save the entire page as a template instead of just a section, simply go to the Elementor panel, click on the hamburger menu in the top left corner, and choose Save as Template. This will save the entire page layout, including all sections and widgets.
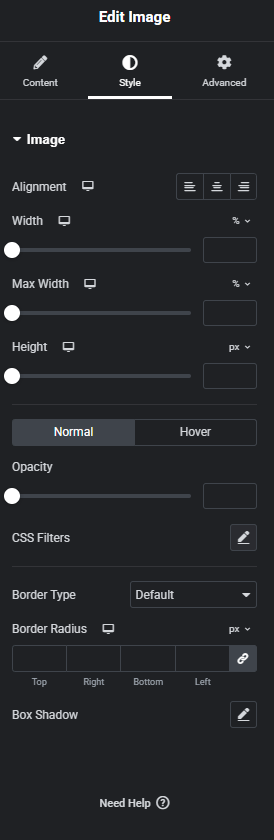
9. Add Filters To Your Images
Chances are, you’ve already customized images in Elementor by adjusting alignment, size, or width.
But did you know you can also perform basic image editing right inside Elementor?
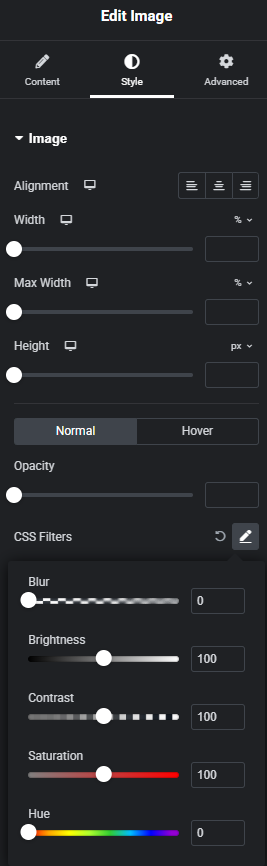
In the Style tab of the image widget, you’ll find an option called CSS Filters. This feature allows you to make simple edits to your images, like adjusting brightness, contrast, saturation, and more!
With CSS Filters, you can adjust the brightness, contrast, saturation, and hue of your image. You can even apply a blur effect to give your images a soft, unique look.
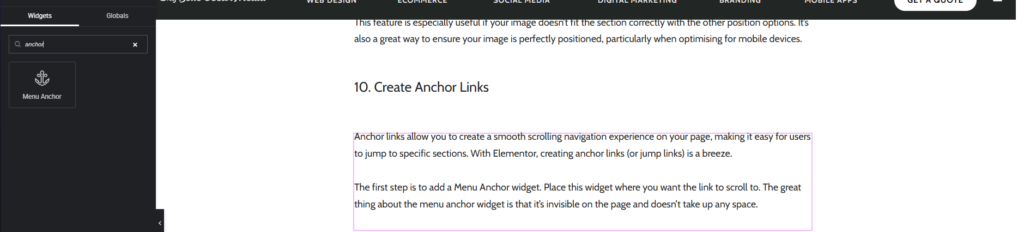
10. Create Anchor Links
Anchor links allow you to create a smooth scrolling navigation experience on your page, making it easy for users to jump to specific sections. With Elementor, creating anchor links (or jump links) is a breeze.
The first step is to add a Menu Anchor widget. Place this widget where you want the link to scroll to. The great thing about the menu anchor widget is that it’s invisible on the page and doesn’t take up any space.
Next, edit the widget that you want to link to. In the link field, type # followed by the anchor name you assigned to your menu anchor (for example, #pricing). This creates a smooth scroll effect when the link is clicked.
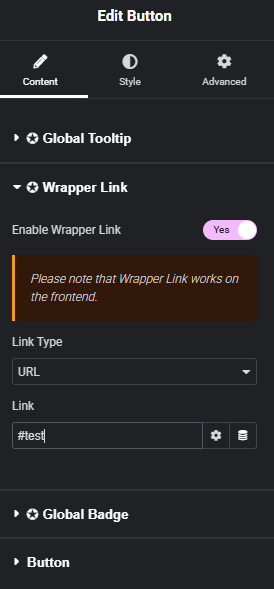
That’s it! Now, when you click the widget, it will smoothly scroll to the menu anchor, creating a seamless navigation experience on your page.