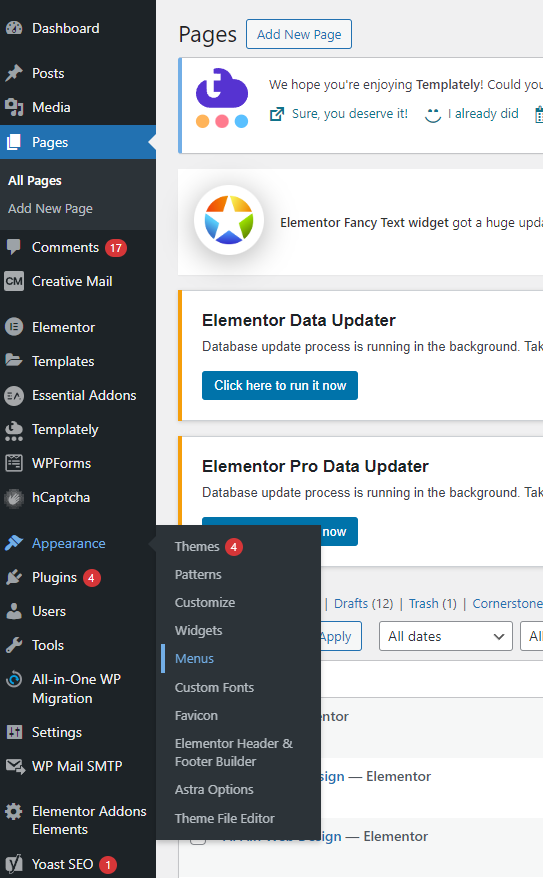
Adding a navigation menu in WordPress is a crucial step in creating a user-friendly website. A well-structured menu helps visitors easily find the content they’re looking for, improving the overall navigation and user experience. Whether you’re building a personal blog or a business site, setting up a navigation menu is straightforward and can be customized to fit your site’s structure and design. Here’s a step-by-step guide to help you add and configure a navigation menu in WordPress.
1. Navigate to Menus:
- In the WordPress dashboard, go to Appearance > Menus.
2. Create a New Menu:
- Click on the Create a new menu link.
- Enter a name for your menu (e.g., Main Menu) and click the Create Menu button.
3. Add Items to Your Menu:
- On the left, you’ll see options like Pages, Posts, Custom Links, and Categories.
- Check the items you want to add to your menu and click the Add to Menu button.
4. Organize Menu Items:
- Drag and drop menu items to arrange them in your desired order.
- To create sub-menus, drag an item slightly to the right under another item.
5. Assign Menu Location:
- Under Menu Settings, check the box for the menu location (e.g., Primary, Footer) where you want your menu to appear.
- Click the Save Menu button
6. Customize Menu (Optional):
- If your theme supports it, you can customize your menu with different styles and settings. Look for additional options under Appearance > Customize > Menus.


