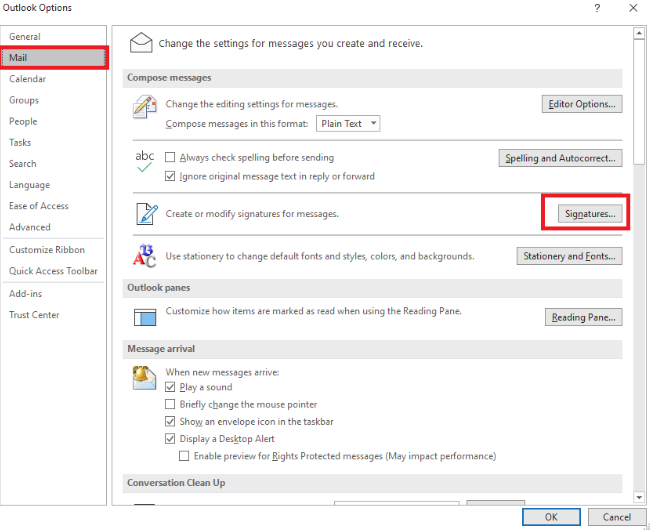
1. Click File.
2. Select Options > Mail > Signatures.
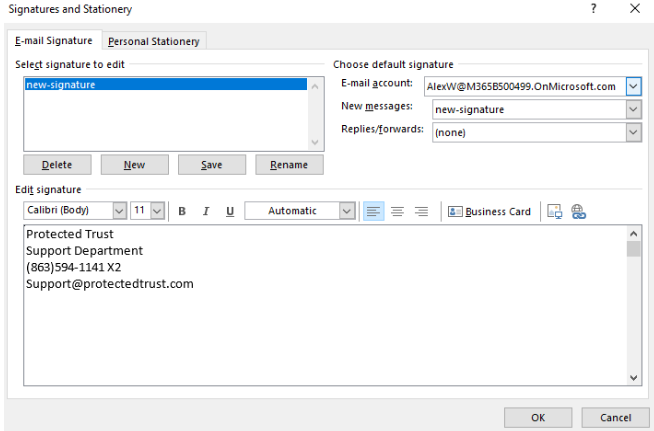
3. Under “Select signature to edit,” choose New. In the “New Signature” dialog box, type a name for the signature.
4. Under “Edit signature,” compose your signature. You can adjust fonts, colors, sizes, and text alignment. For a more robust signature with bullets, tables, or borders, format your text in Word, then copy and paste it into the “Edit signature” box.
5. Under “Choose default signature,” set the following options:
- In the “E-mail account” drop-down box, select an email account to associate with the signature. You can have different signatures for each email account.
- To automatically add your signature to all new messages, select one of your signatures in the “New messages” drop-down box. To disable automatic addition, choose (none).
- To include your signature in replies and forwarded messages, select one of your signatures in the “Replies/forwards” drop-down box. Otherwise, leave the default option (none).
6. Choose OK to save your new signature and return to your message. Note that Outlook won’t add your new signature to the message you opened in Step 1, even if you selected to apply the signature to all new messages. You’ll need to add the signature manually to this specific message. For all future messages, the signature will be added automatically. To add the signature manually, select Signature from the Message menu and then choose the signature you just created.